


Choosing the right Camping Tarp begins with understanding your real outdoor habits. A tarp for summer picnics differs from one used during cold, wet mountain nights. Consider where you camp, how many people need cover, and how much equipment must stay dry. A compact 8-by-10-foot tarp may suit one backpacker. A larger 10-by-12-foot model gives two campers more usable space.
Outdoor-skills educator Dave Canterbury offers a practical principle: “The more you know, the less you need.” That idea matters when selecting shelter. Experienced campers may prefer lightweight silnylon or Dyneema fabric. New campers might value stronger polyester, simpler setup, and clearer attachment points. Check waterproof ratings, seam construction, reinforced corners, and the quality of grommets or webbing. Small details matter when rainwater runs along the ridgeline at midnight.
Think about wind, too. A tarp can feel spacious in calm weather but exposed during sudden gusts. Look for strong guylines, reliable stakes, and several pitching options. Do not choose by weight alone. An ultralight tarp may save your shoulders but demand greater skill. That trade-off is easy to underestimate. I have found that the “best” Camping Tarp is rarely the most expensive or largest model. It is the one you can pitch confidently, pack easily, and trust when the forecast changes. This guide will compare materials, dimensions, shapes, weather resistance, and setup needs, helping you make a careful choice rather than an impulsive purchase.
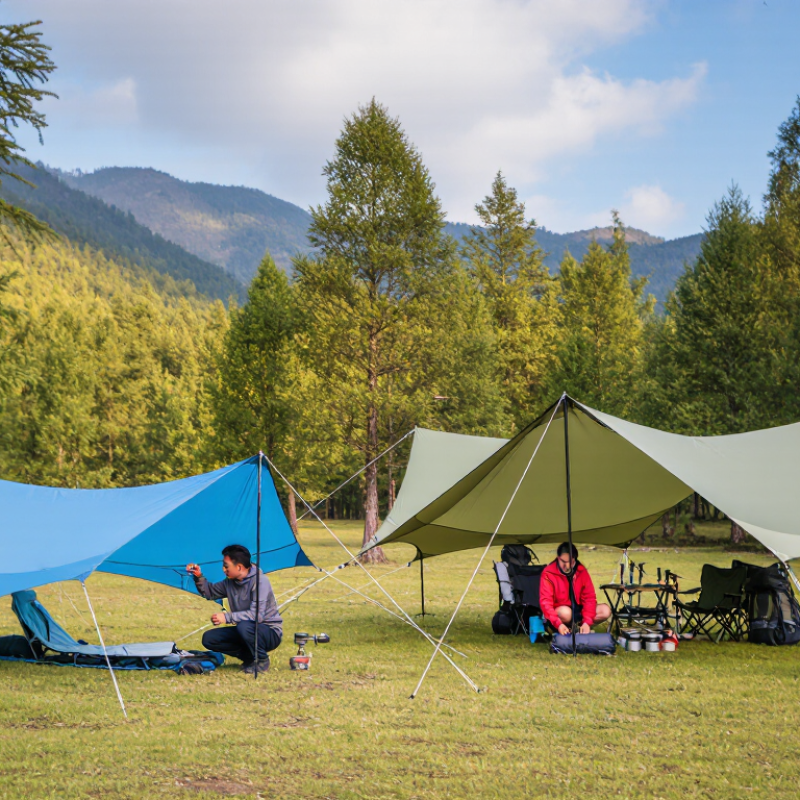
Choosing a camping tarp starts with the shelter you actually need, not the lightest package. For one person, a compact tarp may cover a sleeping area and leave room for a small pack. Two campers need more width for gear, cooking space, and changing wind direction. I measure the expected footprint before choosing. A tarp can look generous at home but feel narrow beside wet backpacks. Capacity changes everything.
Season affects fabric strength, coverage, and pitching options. A three-season tarp usually handles rain and moderate wind with careful setup. For colder trips, extra coverage can reduce drafts and protect sleeping bags from blowing snow. However, a tarp is not automatically a storm shelter. I once used a minimal pitch during heavy rain and underestimated splashback from the ground. That mistake taught me to check sidewalls, ridgelines, and drainage together.
Terrain decides whether the tarp can be secured properly. Forest trips may offer strong trees, while open ground requires dependable stakes and longer guylines. Rocky soil can make a large tarp frustrating to anchor. Trip duration matters too. For an overnight hike, low weight may outweigh comfort. On a week-long trip, livable space and repairability become more important. I inspect seams, tie-out points, and fabric before leaving, even when the tarp appears new. Small weaknesses become serious after repeated tension.
are dependable in changing weather. A ridgeline supports the center, while two sloping panels shed rain efficiently. This design offers useful headroom along the middle, but limited space near the ends. I usually face the narrow end toward strong wind. That small adjustment reduces flapping and protects the sleeping area. Use sturdy stakes and keep the ridgeline slightly tensioned, not painfully tight.
provide the most pitching freedom. You can create an A-frame, lean-to, diamond, or raised roof. They suit experienced campers who can read wind direction and ground shape. However, flexibility brings mistakes. I have pitched one too high, then watched rain blow underneath. A lower edge and careful seam positioning would have helped. Flat designs work best when you carry enough guylines and practice before a trip.
folds one tarp edge upward, creating a protected floor and partial wind wall. It can work well on damp ground, especially when you need a quick shelter. Check that the raised edge does not collect water.
use a central line to support the tarp lengthwise, creating balanced coverage and easy ventilation. They are practical for two sleepers, but poles or trees must be placed securely. Measure your sleeping pads first. A beautiful pitch can still feel cramped at midnight.
How to Choose the Right Camping Tarp for Your Needs?
Fabric weight strongly affects a tarp’s balance between portability and weather protection. A 20D fabric feels remarkably light in a backpack. It suits careful hikers and dry-season trips. However, thin material can demand gentler pitching and cleaner ground. A 30D tarp offers more confidence without becoming excessively heavy. It is often a practical choice for mixed conditions. A 40D fabric usually resists abrasion better, especially near rough soil or branches. The penalty is noticeable weight.
Hydrostatic head testing adds another useful comparison. Under ISO 811, fabric faces increasing water pressure until leakage appears. The result is measured in millimetres. A higher rating generally indicates stronger resistance to sustained rain. It does not guarantee a completely dry shelter. Seams, zippers, tension, and damaged coatings still matter. I have seen a high-rated fabric leak around poorly sealed stitching. The fabric was not the real weakness.
When comparing 20D to 40D options, check hydrostatic head beside weight. Do not judge durability from denier alone. Coating type, weave, and construction can change field performance. A 20D tarp may perform well when pitched carefully and packed away dry. A 40D model may feel reassuring during windy, abrasive trips. I once chose the lighter option and regretted it near thorny vegetation. Still, heavier fabric is not automatically better for every route. Your hands, weather forecast, campsite surface, and tolerance for repairs should influence the decision. A small tear can change the whole calculation.
Representative waterproof tarp constructions are compared by fabric denier and ISO 811 hydrostatic-head rating. Higher hydrostatic-head values generally indicate stronger resistance to water pressure, while lower-denier fabrics reduce packed weight.
The values shown are representative specification levels for coated lightweight nylon or polyester tarp fabrics, not universal performance limits. Actual waterproofness depends on yarn type, weave, coating, seam construction, and test conditions. ISO 811 measures resistance to water penetration using hydrostatic pressure.
A good camping tarp should match the people, gear, and weather you expect outdoors. Start with a coverage target of 2–3 square metres per person. This gives each camper room to sit, cook safely, and store a small pack. A four-person group may need 8–12 square metres, not just the sleeping area. Leave extra space for sloping edges and uneven ground. More coverage usually improves comfort, but it also adds weight and setup time.
Tips: Measure usable floor space, not the tarp’s advertised dimensions. Check the shelter from several angles. If rain can blow under one side, the tarp is too open for that campsite. Lower the windward edge and raise the opposite edge slightly for airflow. Practice this adjustment before your trip.
Side protection matters as much as overhead coverage. A high, flat tarp can feel spacious, yet wind-driven rain may reach bedding and clothing. Look for enough width to create lowered sides or a storm shelter shape. My first tarp offered plenty of floor area, but its short edges left my sleeping bag damp after one windy night. I had measured the centre, not the protected space. That mistake still influences my choices. Consider trees, slope, and prevailing wind before deciding the final size. A smaller tarp with well-positioned sides can outperform a larger tarp in exposed weather.
How to Choose the Right Camping Tarp for Your Needs?
When choosing a camping tarp, study its wind hardware before judging its fabric. A strong tarp can still fail if its guy lines stretch or its tie-outs pull loose. For most three-season trips, 6–10 mm guy lines offer a useful balance between grip, weight, and handling. Thinner cord saves space, but it can feel difficult to adjust with cold fingers. Thicker cord is easier to knot, though it adds bulk.
Inspect every tie-out. Reinforced patches should spread tension across the tarp instead of concentrating it at one small stitch. I usually tug each attachment gently before pitching, then check it again after the first strong gust. That habit has prevented problems, although I once trusted a neat-looking seam too quickly. It tore slightly overnight. I should have examined the stitching more closely.
Tips: Match line thickness to expected weather. Use 6 mm lines for lighter trips and 8–10 mm lines for exposed camps or larger tarps. Add secure knots, but avoid over-tensioning the fabric. Leave a little flexibility. Wind shifts. A small loop or tension adjuster can make shelter adjustments faster, especially when rain covers your hands. Examine reinforcement corners for loose threads, uneven stitching, or fabric distortion. These details are easy to miss. Test the complete setup at home first. It is less dramatic there.
| Wind-Hardware Dimension | Recommended Specification | Best Use | What to Check | Wind-Resistance Benefit | Practical Trade-Off |
|---|---|---|---|---|---|
| Guy-line diameter | 6 mm | Lightweight backpacking tarps and moderate-weather camping | Look for low-stretch cord with a secure sheath and a visible color for easier handling at night. | Provides a useful balance of strength, weight, and packability for ordinary shelter tensioning. | Less comfortable to grip and generally less abrasion-tolerant than thicker cord. |
| Guy-line diameter | 8 mm | General-purpose three-season camping and frequent setup | Check that the cord runs smoothly through line adjusters and does not flatten excessively under tension. | Offers improved handling and abrasion resistance while remaining reasonably lightweight. | Occupies more pack space than 6 mm cord and adds modest weight. |
| Guy-line diameter | 10 mm | Large tarps, exposed campsites, repeated use, or heavier weather loads | Confirm that hardware openings, line locks, and tarp attachment points accept the larger diameter. | Provides a more substantial grip and better resistance to wear at high-use or high-load points. | Heavier and bulkier; may be unnecessary for small tarps in sheltered locations. |
| Guy-line construction | Low-stretch braided cord | Maintaining a taut ridgeline and stable perimeter | Prefer cord that resists permanent elongation and remains flexible in cool or damp conditions. | Helps reduce slack caused by movement and minimizes repeated retensioning. | Very stiff cord can be harder to coil and may be less convenient for compact packing. |
| Line adjusters | Compatible sliding tensioners or friction-based adjusters | Fast pitching and easy tension changes | Test adjustment with gloves or wet hands and verify that the line does not slip under normal tension. | Allows the shelter to be tightened after fabric relaxation or changing conditions. | Small adjusters can be difficult to operate in darkness or freezing weather. |
| Primary tie-outs | Reinforced corner and edge attachment points | Transferring tension from the tarp fabric to the ground anchors | Check for multiple fabric layers, clean stitching, secure webbing, and no loose threads around the attachment. | Spreads load over a larger area and reduces the chance of localized fabric tearing. | Additional reinforcement adds some weight and may increase packed bulk. |
| Mid-panel tie-outs | Reinforced attachment points on broad panels | Large tarps or windy pitches where panels flap | Use only when the tarp is designed for the load; avoid pulling a single panel attachment excessively. | Reduces unsupported fabric span, panel movement, and wind-driven flapping. | Requires extra guy lines and suitable anchor locations, increasing setup time. |
| Reinforcement shape | Layered patches with rounded edges | High-load corners, ridgeline ends, and frequently tensioned points | Rounded patch edges are preferable because they reduce sharp stress concentrations in the fabric. | Improves load distribution and helps limit progressive tearing from a stressed attachment point. | Reinforcement quality depends on stitching and fabric compatibility, not patch size alone. |
| Ridgeline hardware | Strong, smoothly finished attachment loops or clips | Continuous ridgelines and high-tension tarp configurations | Inspect for sharp edges, twisting, and sufficient clearance for the chosen 6–10 mm line. | Supports even tension along the shelter’s main structural line and reduces abrasion. | Metal components can add weight; hard edges can damage cord or fabric if poorly finished. |
| Anchor compatibility | Guy lines matched to stakes and soil conditions | Sand, loose soil, forest floor, and firm ground | Select anchors based on soil holding power; a strong guy line cannot compensate for an inadequate stake. | Improves overall stability by keeping the load path secure from tarp to line to ground. | Heavier or specialized stakes may be needed in loose or highly exposed terrain. |
| Tensioning practice | Firm, even tension without over-tightening | All tarp shapes and weather conditions | Pitch into the wind where possible, remove wrinkles gradually, and retension after fabric becomes damp. | Limits flapping and distributes wind loads more evenly across the shelter. | Excessive tension can overload seams, tie-outs, poles, or stakes instead of improving stability. |
| Visibility and safety | High-visibility guy lines or reflective markers | Nighttime campsites and busy camping areas | Use contrasting or reflective sections and keep lines outside common walking routes. | Does not increase structural strength, but helps prevent accidental trips and pulled-out anchors. | Reflective elements may add a small amount of weight and can become less visible when dirty. |
Selection note: Choose the lightest guy-line and tie-out system that matches the tarp size, expected exposure, soil conditions, and season. The stated diameters are practical recommendations rather than universal load ratings; inspect all cord, stitching, hardware, and anchors before use.